Everyone loves good quality bass as it makes the reproduction of sound feel natural and full. Bass rhythm and timing are critical foundations of music and movie soundtracks. The subwoofer, (bass speaker) is a low-pressure inducing device that radiates low-frequency sound (bass) within your system. Arendal Sound subwoofers sound better than most, and this is before factoring in the value-to-cost ratio. But if you want to take your low-frequency experience a few notches higher, you will need to experiment. The placement of the subwoofer(s) within the room can “make-or-break” your speaker system performance. A poorly positioned subwoofer will deliver an uneven, sluggish, and damped bass response that will not sound natural. The purpose of this guide is to help you get your subwoofer placed in the correct position within the room and configure it for the best possible bass performance.
As previously mentioned, the performance of a subwoofer is intricately linked to the room in which it sits, therefore it is impossible to optimize the subwoofer without considering the room and its influence on sound. This room influence can be described in two points:
- The structure of the sound waves reflected within the room and how they super-impose on top of each other to deliver excessive (peaks) at certain frequencies (making bass sound boomy), at the same time causing total cancellations at others (nulls – making bass sound anemic or thin). This is called Room Modes.
- The second is the room’s ability to absorb bass sound waves (or as you will hear it, allowing bass to leak out) through flexible structures like stud walls.
Essentially, every room is different and that’s why ultimately there is no one-size-fits-all approach to subwoofer integration. The following recommendations are relative and it will always depend on your individual circumstances. Once you find the optimal spot to place your subwoofer(s) it will be time to run your room correction software.
SINGLE SUBWOOFER
CORNER PLACEMENT
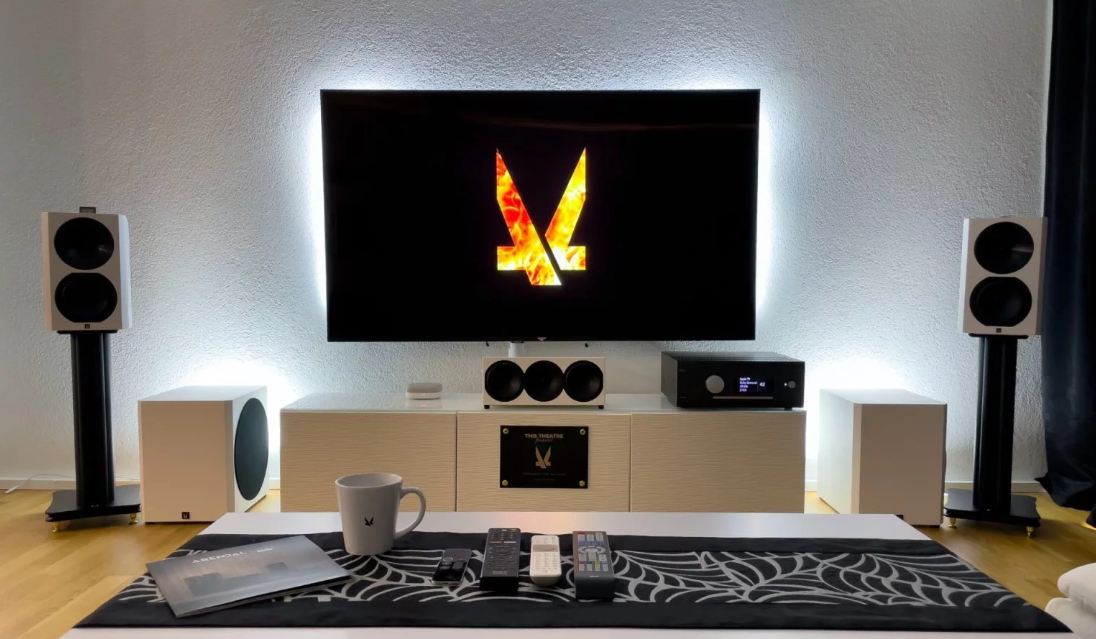
The easiest way to begin positioning the subwoofer in the room is to place the subwoofer towards one of the front corners, preferably one that does not have any openings near it. Having the subwoofer in a corner will give you the best room coupling and gain, increasing the apparent bass output and impact (corner loading). You may not want all of the output generated by this type of placement, however, you can always attenuate the subwoofer and as a result, enjoy increased dynamic headroom and lower distortion. Adding to that, this placement greatly simplifies the structure of room modes (the peaks and nulls the overlapping bass waves produce), meaning your AVRs room correction software can easily EQ the peaks for smoother frequency response.
SUBWOOFER CRAWL
This technique can help you easily find a suitable location for the subwoofer without dragging the subwoofer throughout your room. Instead, place the subwoofer at your main listening position at ear height. This may take a longer signal cable and extension power cable to do this method and also please ensure the subwoofer is secure to prevent damage to the subwoofer and to prevent possible injury if it tips over. Play some bass-heavy music, preferably something with a repeating bass line, and crawl on the ground with your ear at the height of the subwoofer. Carefully listen to how the bass sounds in different locations. Once you find a location that has the most balanced and accurate sounding bass, this is where you will want to place the subwoofer.
PLACEMENT IN THE BACK
Low bass frequencies are omnidirectional and not localizable so you can also place the subwoofer in places you don’t traditionally think about such as the back of the room. In theory, this could work, but most of the time a proper time alignment is rather difficult, and with higher bass frequencies, like the LFE channel on movie soundtracks that goes up to 120Hz, this will result in you hearing where the sound is coming from (bass localization). Placing the subwoofer in the back of the room is only recommended for those that have the proper equipment for this type of placement (DSP (Digital Signal Processor) onboard or external) etc.
STEREO SYSTEMS (Single Subwoofer)
Stereo systems without any type of bass management, delay, or room correction will require a slightly different approach for subwoofer placement. For a single subwoofer, a good placement is the center between the speakers. Bass imaging will be at its best and it also allows for higher crossover points when used in conjunction with smaller speakers. All the recommendations above will make localization issues disappear and you will have the impression you are listening to one coherent system. The low pass frequency you set is equally important, as the higher (e.g. 120Hz) you go, the potential for the subwoofer to be localized is much greater than at lower frequencies (e.g. 40Hz).
DUAL or MULTIPLE SUBWOOFERS
STACKING
If you found a great place for your first subwoofer and you feel you need “more” output, an easy way to supplement your need for more output is to stack another subwoofer directly on top of your first one.
2 big advantages here:
- It lower distortion by 6db and increase the output by 6db, making the 2 subwoofers act like one big driver. There will be no need for additional EQ or time delay, as it is a very straightforward and easy setup. This works best when the subwoofers are identical or of the same type i.e. sealed subwoofer stacked with a sealed subwoofer.
- The extra height of the second subwoofer on top also couples better with the room’s acoustics exciting room modes more evenly and creating a better frequency response.
MIRROR / OPPOSITE
One of the most commonly used practices will be the mirror/opposite placement. In this type of placement, the main objective is to try and position the second subwoofer as symmetrically as possible in the direct opposite placement of the first subwoofer. This principle can be also front-to-back and side-to-side. Just be aware that having the subwoofers too close to each other (side to side) will allow them to act as a single driver and that would not allow the room modes to be managed effectively. Using this method It is crucial to have an AVR or DSP to set appropriate levels and delay since basically no room is 100% symmetrical and the subwoofers will have slightly different frequency responses.
Compared to the stacking method you will not gain the full 6db in output and reduced distortion, as it will vary with frequency and distance between the subwoofers.
In the real world, you can expect around 3db in the upper-frequency range and closer to 6db in the very low frequencies. However, you will get a much better seat-to-seat frequency response consistency with even fewer localization effects.
DIAGONAL / OPPOSING CORNERS
The most preferred placement method will be diagonal in opposing corners (caddy corner) i.e. one subwoofer in the front right corner and one subwoofer in the back left corner or vice versa. This creates the most balanced frequency response as it excites both the axial and tangential room modes very evenly, correcting the peaks and nulls. The result is very consistent bass throughout a wide bandwidth, also making higher crossover points possible, without being localizable. This placement is optimized for better seat-to-seat consistency and dynamic headroom.
With this kind of setup, you will need an AVR or DSP with two independent subwoofer outputs with a wide range of adjustability. Fine-tuning a setup like this can take some time and usually requires software ( REW – Room EQ Wizard ) and a calibrated USB measuring microphone. The time invested with these tools is definitely worth the effort as it can be a game-changer when it comes to overall system performance.
STEREO SYSTEMS (Dual Subwoofer)
Just as with the Single Subwoofer setups in a Stereo 2.1 System. Placement of the subwoofers in the stereo environment will be key to keeping the sound filling full and naturally balanced across the sound stage. The key here will be to get the subwoofers placed in close proximity to the respective channel main speaker and keep the distance of the subwoofer relatively the same as the listening position. This will guarantee a proper match between the subwoofer(s) and the main speaker’s phase. If your AVR / Amplifier has a pair of stereo outputs and not LFE or bass management capabilities, you will need to have the proper channels connected to the corresponding subwoofer i.e “Left” low-level output to the left subwoofer, “Right” low-level output to the right subwoofer. As with single subwoofer stereo systems, the low pass frequency you set is very important, as the higher (e.g. 120Hz) you go, the potential for the subwoofer to be localized is much greater than at lower frequencies (e.g. 40Hz).
All the recommendations above will make localization issues disappear and you will have the impression you are listening to one coherent system.
COMBINATION OF PLACEMENTS
There are many different subwoofer placement combinations that can be utilized within a speaker system, all have their advantages and disadvantages. If you have the possibility of placing more than 2 subwoofers within your system, you can go for a mix of placement ideas. Please note that the more subwoofers you add to the system, the more important the processing capabilities need to be within the DSP or AVR. Most importantly, you will need independent subwoofer outputs for each subwoofer with its own adjustability to perfect the multi-subwoofer integration.
For example, three (3) subwoofers are added to a system. The first two subwoofers are placed up in the front left and right corners of the room (Mirrored) and the third subwoofer is placed in the middle of the room on the back wall. This placement method combines the great room gain/less distortion and consistent wavefront from corner loading with the “filler” functionality of the subwoofer in the rear. This method produces a very smooth and even frequency response and great seat-to-seat consistency. Just as with the other placement methods that have front and back of room subwoofers, timing, and phase will be key in getting the subwoofers working in unity with each other.
We encourage everyone to follow this guide and experiment as much as possible to optimize their bass performance. If you are still having issues after trying the techniques we encourage you to get in touch with us at support@arendalsound.com. Here you will get expert advice on how to best place your Aredal Sound Subwoofer and configure it to match your individual needs.