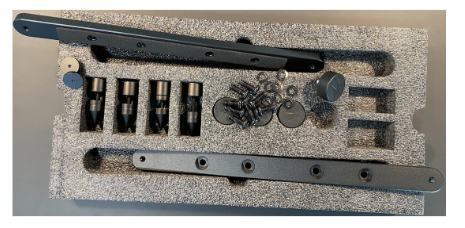
Content of Spikes Kit:
- 2 aluminium bars
- 4 aluminium spikes
- Spikes nuts
- Spikes washers
- 4 rubber pucks
- 8 bar screws (6 for 1961)
- 8 spring washers (6 for 1961)
- 4 metal discs
- Hex key
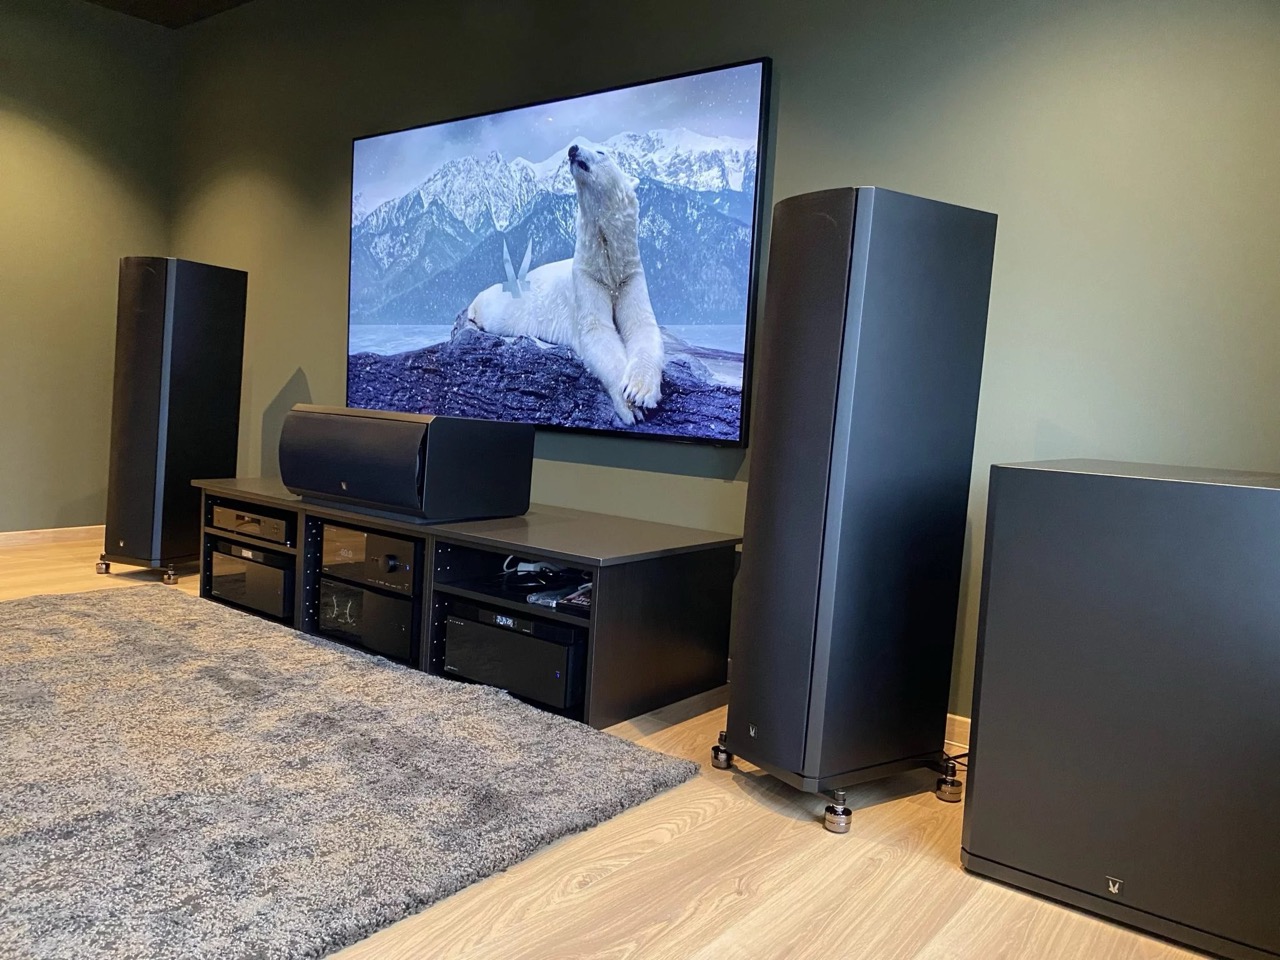
Step 1: Begin by placing the loudspeaker upside down to facilitate the mounting of the Spikes Kit.
Step 2: Align the bar with the screw inserts in the speaker cabinet, ensuring that the bar’s soft foam faces the cabinet. This will provide optimal stability and vibration isolation.
Step 3: Place one spring washer in each of the Spike bars’ screw holes, ensuring that they are flush against the bar.
Step 4: Carefully insert each of the screws into the bar, ensuring that the alignment is correct before tightening each screw. This will ensure that the spikes are installed evenly and securely.
Step 5: Disassemble the nut from the spikes and screw it into the bar. Once the nut has been tightened to the bar, add the nut to the spike. Alternatively, you may choose to use rubber pucks instead of spikes.
Step 6: Now, here’s the important part – when you’re positioning those speakers, try not to wiggle them back and forth on the spikes like they’re on a dance floor. It may look like fun, but it could cause damage to your spikes and your floor. So, instead, show your floor some love by carefully lifting the speakers in place and adding those metal discs under each spike.